 Save
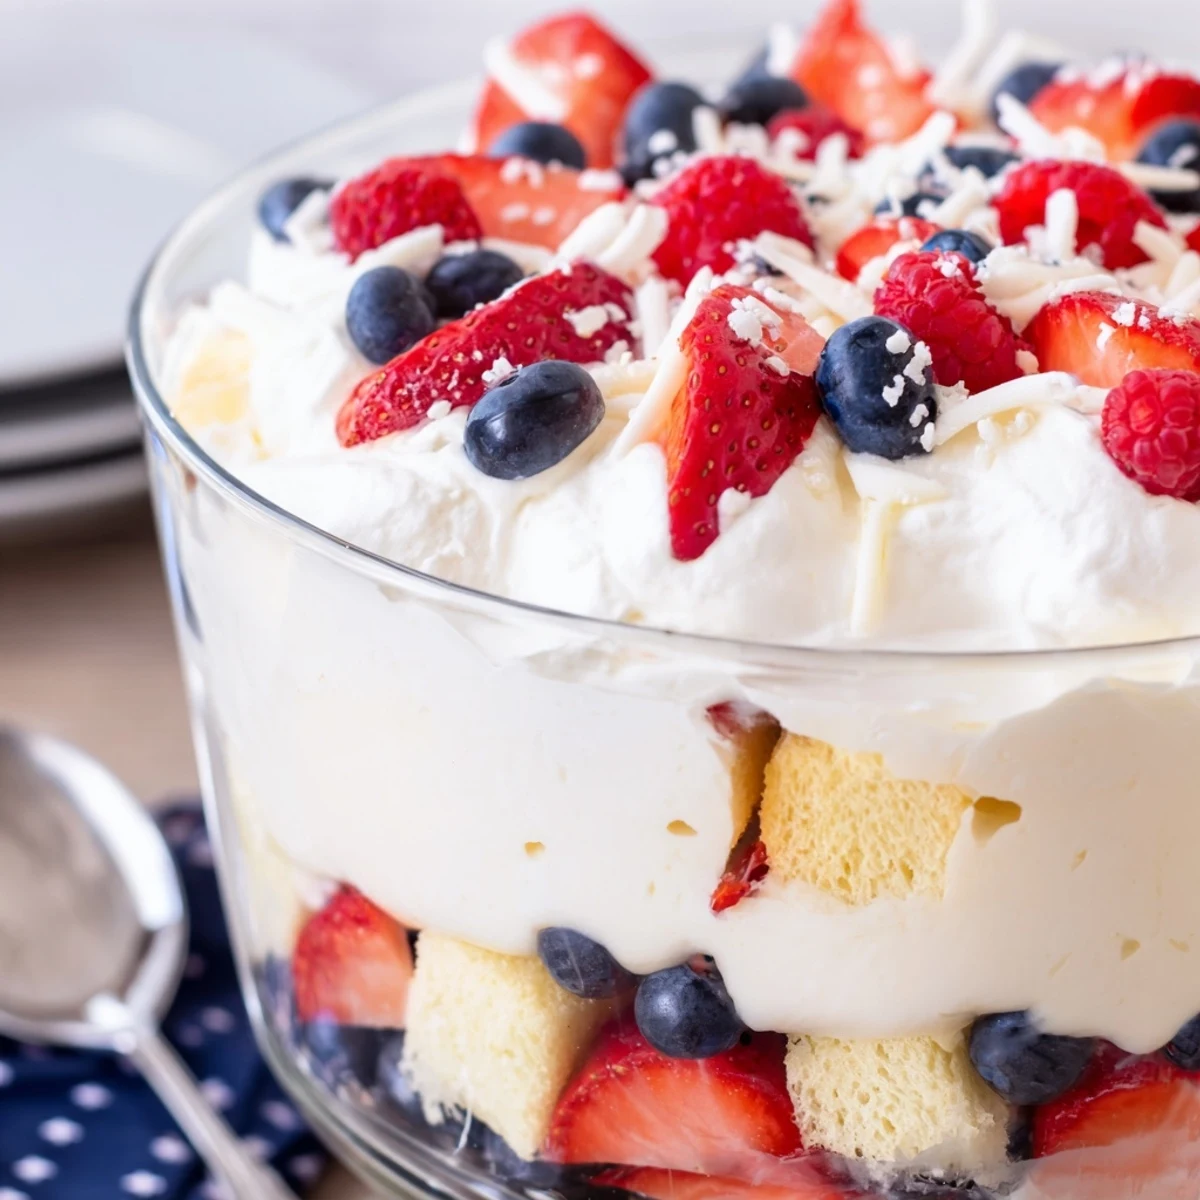
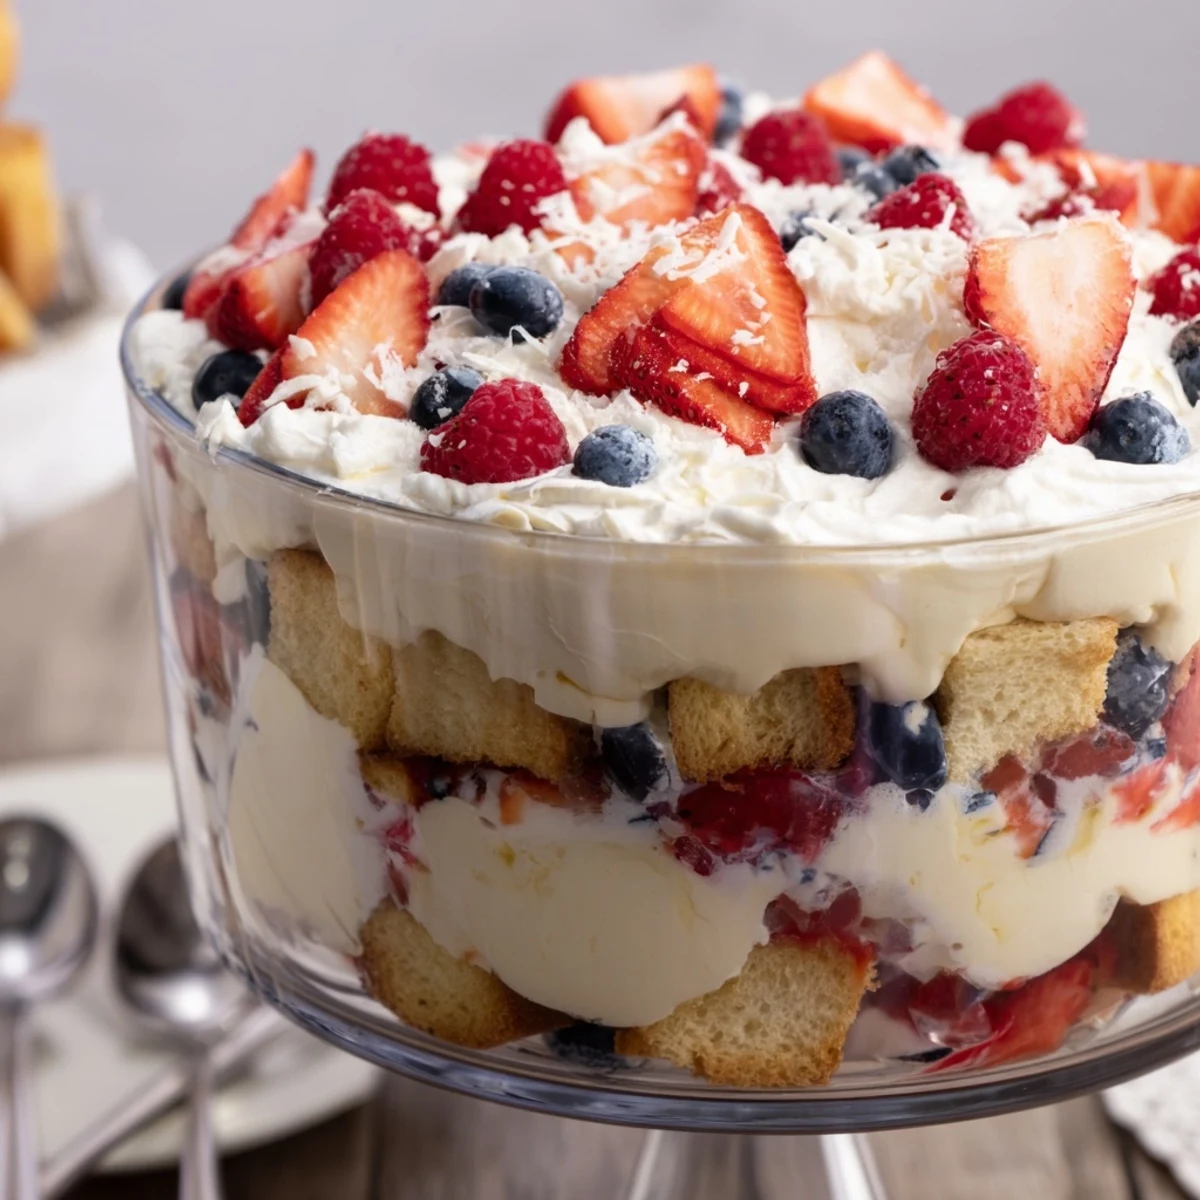
Save Quick to assemble in about 20 minutes plus chilling time, this red, white and blue trifle layers cubed pound cake with instant vanilla pudding, a cloud of whipped cream and generous amounts of strawberries, blueberries and raspberries. Refrigerate at least 2 hours so the layers set and flavors meld. Use a clear bowl to show the stripes and garnish with extra berries or white chocolate shavings. Swap cake types or lighten the cream to suit texture and sweetness preferences.
The first time I made this Red White And Blue Trifle, my kitchen was alive with the sound of fireworks booming in the distance. Berries scattered across the counter, leaving little stains on my fingertips, and the cool scent of whipped cream hung in the air. I wasn’t sure how the layers would stack in the bowl, but the colors looked so electric that I couldn’t help but smile as I built each one. By the time the last berry landed on top, the anticipation for dessert was as strong as the summer heat outside.
I vividly remember assembling this for a spontaneous poolside barbecue with friends, still in swimsuits and sun hats. The conversation kept circling back to the dessert bowl on the table, and every time someone passed by, they’d sneak a berry or a dollop of cream. More than once, I caught laughter spilling over as someone found the corner where the pudding was thickest. Even the dog waited hopefully nearby, drawn by the sweet, creamy scent.
Ingredients
- Pound cake or angel food cake: The sponge soaks up all the flavors—cut into chunks to hold its shape and give every bite texture.
- Fresh strawberries: Slice them just before using for the brightest color and fresh berry aroma.
- Blueberries: These add little bursts of juice; if you roll them on a paper towel, they layer smoothly and don’t slip around too much.
- Raspberries: Handle gently—crushing them releases vivid red juice that seeps into the cream layers.
- Whole or 2% milk: Cold milk helps the instant pudding set quickly and gives a rich, luscious base.
- Instant vanilla pudding mix: It’s my shortcut for creamy flavor—it thickens in minutes for a foolproof layer.
- Heavy whipping cream: Whip until stiff for those cloud-like layers; a chilled bowl makes this faster and fluffier.
- Powdered sugar: Just enough makes the cream sweet without overpowering the fruit.
- Vanilla extract: Adds bakery-warmth and rounds out the pudding’s flavor.
- Extra berries for garnish: Scatter on top for a bold, party-ready finish that shows off the colors.
- White chocolate shavings (optional): They add sparkle and a creamy richness—use a vegetable peeler for curlier pieces.
Instructions
- Mix the pudding:
- Pour cold milk into a bowl and whisk in the pudding mix—listen for that swoosh as it comes together. In just a few minutes the texture will be velvety and thick enough to hold a spoon upright.
- Whip the cream:
- Grab your mixer (or a strong arm!) and beat the cold cream, powdered sugar, and vanilla until soft peaks hold their shape. Watch for when the cream looks like clouds but doesn’t start to look grainy.
- Layer the cake:
- Tumble half the cake cubes gently into your trifle bowl, letting them fall in unevenly for a rustic look. Tiny edges might stick up here and there—that’s the best part for absorbing the cream.
- Start the layers:
- Spoon a third of the pudding over the cake cubes and spread gently; spoon on whipped cream until it covers the layer in billowy clouds.
- Add the first berries:
- Scatter half the strawberries and blueberries; a little messiness just adds to the appeal. Try to get some berries right at the edges for maximum color in each slice.
- Repeat the layers:
- Layer on the remaining cake, followed by another third of pudding and cream, then the raspberries and leftover berries. Press lightly to fit all those layers together.
- Final touches:
- Spread on the last pudding and swirl the remaining cream over the top. Finish with generous handfuls of fresh berries and a little white chocolate for drama if you like.
- Chill and serve:
- Cover and refrigerate for at least two hours—longer is even better—so every bite melds into one sweet, colorful spoonful.
 Save
Save One July, my cousin and I competed to see who could create the most picture-perfect layer, turning the kitchen counter into a little arena of whipped cream and berry drips. We ate almost as much as we assembled, but when we stepped back, the result was a striped masterpiece bright enough to rival any summer fireworks. That was the first time dessert disappeared before anyone even thought about seconds.
Making It Ahead for Parties
What surprised me most is how forgiving this trifle is when made ahead—it gets even better as the flavors mingle overnight. If you’re short on prep time the day of your event, just assemble and leave in the fridge for the colors and flavors to bloom.
Express Layering Tips
A clear glass bowl transforms the process into a visual treat all its own. Pressing berries to the edges lets everyone see those bold stripes before they dig in.
Berry Swaps and Variations
I’ve improvised with everything from kiwi to blackberries when the usual trio wasn’t available—there’s plenty of room to play with what’s ripe or what’s left in the fridge.
- Frozen berries work, just let them thaw and drain first.
- You can splash a berry liqueur over the cake for a grownup twist.
- If you’re worried about allergies, always double-check every packaged ingredient before you start.
 Save
Save This trifle always brings a playful energy to the table, whether you’re chasing kids around or just soaking up the summer sun. I hope you enjoy building your own layers and making your next gathering a little more colorful.
Recipe FAQs
- → How far ahead can I assemble the trifle?
-
You can assemble it up to 24 hours ahead; cover and refrigerate. For best texture, add the final whipped cream and extra berry garnish just before serving to keep them fresh.
- → Can I use frozen berries instead of fresh?
-
Yes. Thaw and drain frozen berries well to avoid excess liquid. Toss with a little sugar to macerate if they seem firm, then layer as directed.
- → What can I substitute for pound cake?
-
Angel food cake, sponge cake or sturdy store-bought sheet cake all work. Choose a neutral, absorbent cake so it soaks up the pudding and berry juices without falling apart.
- → How can I make a lighter version?
-
Use light whipped cream or fold in vanilla yogurt with the pudding to reduce richness. Using a lighter cake and less sugar on the fruit will also cut calories.
- → Can I make the pudding from scratch?
-
Yes. A cooked vanilla custard can replace instant pudding; cool it completely before layering. Note that homemade custard may be softer, so allow extra chilling time to set.
- → What about allergen swaps?
-
To avoid dairy, use nondairy milk and a coconut or soy whipping alternative. For gluten-free, substitute a gluten-free cake. Check labels on pre-made items for cross-contact warnings.